11969296755 5b9a8d9e43 o d

[vc_row][vc_column width=”1/1″][/vc_column][/vc_row][vc_row][vc_column width=”1/1″][vc_column_text]

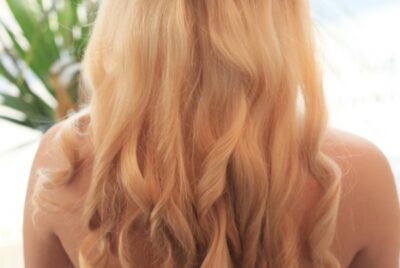
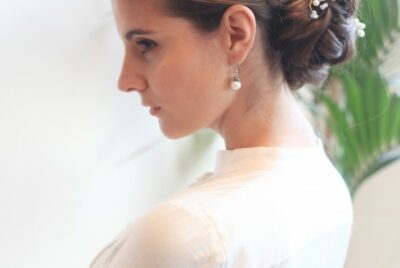
One of our favourite Oscars hairstyles has to be from Julia Roberts who wore vintage Valentino to the 73rd Academy Awards back in 2001. She selected a gown from Valentino’s 1992 collection, looking the epitome of old Hollywood glamour when she collected the award for Best Actress in Erin Brockovich. Julia Roberts wore this vintage Valentino gown to the 73rd Academy Awards in 2001 where she won best Actress for Erin Brockovich. The black velvet gown with white piping was paired with subtle jewellery and make up and the most beautiful updo. Take a look at how to create our take on it.

[/vc_column_text][vc_empty_space height=”32px”][/vc_column][/vc_row][vc_row][vc_column width=”1/2″][vc_column_text]Step one: Start with freshly washed and thoroughly dried hair. Apply a hair mousse that will lift the roots and evenly cover the hair from the roots to the tips. With the hair dryer and a large flat brush create extra body and shine.

Step two: Next create a side parting on the left side of the head. Then create a section from the parting to the top of the ear on both sides, and a final section from ear to ear at the back. Clip the bottom section out of the way.

Step three: With the back section you need to backcomb it to build in more volume. Smooth over the top of the section and create a loose ponytail. You can mist over the section with hairspray to tame any flyaways. Unclip the bottom section and then pin the ponytail into the base.

Step four: Now take all of the loose hair and roll it up into the base of the ponytail allowing it to spread out. Take hold of a large bobbypin and pin it right into the base.

Step five: Take the front section on the right hand side that you left out at the start, pulling it over to the left and wrap it around and under the roll. Pin in place and then do the same with the section on the left, pulling it over to the right wrapping it around and under the roll. Again pin it in place.[/vc_column_text][/vc_column][vc_column width=”1/2″][vc_column_text]

[/vc_column_text][vc_column_text]

[/vc_column_text][/vc_column][/vc_row]
Nicole Kidman 2012 cropped

[vc_row][vc_column width=”1/1″][/vc_column][/vc_row][vc_row][vc_column width=”1/2″][vc_column_text]

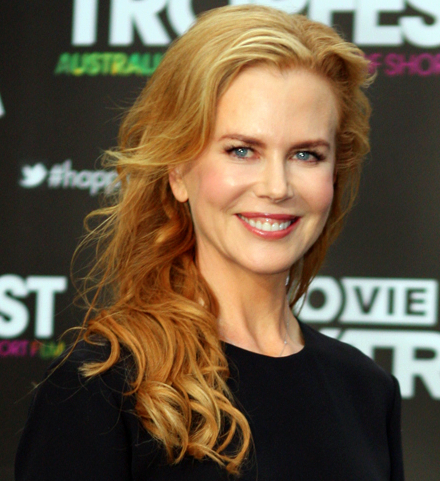
Today, we’re taking a look back for one of our favourite up dos which came from Nicole Kidman back in 2013. We have put together a quick ‘how to’ of our own version of this pretty curved lace braid for you to try your hand at…

[/vc_column_text][vc_empty_space height=”32px”][vc_column_text]Step 1: You need to start off by adding in lots of texture as it will not work well on sleek, glossy hair. If the hair has been freshly washed then comb through mousse and tousle it as you blow dry.

Step 2: Set the hair in hot rollers and leave them in for five minutes, or alternatively curl with tongs and once cool comb through with your fingers to separate up the ringlets.

Step 3: Take hold of a section of hair just above the left ear and create a lace braid from the left to the right adding in pieces of hair as you go. Once you have braided across the middle of the head you can begin to curve the braid down until you reach the right ear. Finish the braid off as a regular plait and secure with a clear hair band.

Step 4: Start at the left side again and create a second lace braid just under the first. Braid in exactly the same way again curving once you reach the middle of the head; make sure that you add in hair from the hairline as you curve round pulling in all of the hair. Finish with a regular plait and secure with another hair band.

Step 5: Roll up the second braid to make a spiral and fix in place with bobby pins.

Step 6: Take hold of the first braid and curl it round the second braid and again pin in place.[/vc_column_text][/vc_column][vc_column width=”1/2″][vc_column_text]

[/vc_column_text][vc_column_text]

[/vc_column_text][/vc_column][/vc_row]
braids

[vc_row][vc_column width=”1/1″][/vc_column][/vc_row][vc_row][vc_column width=”1/1″][vc_column_text]

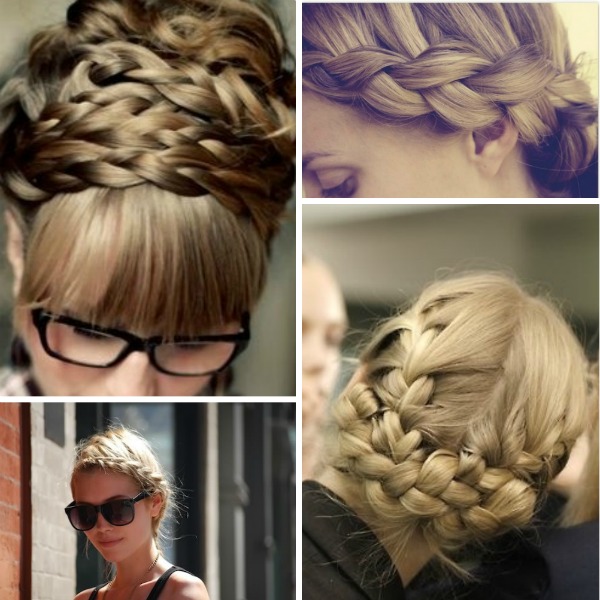
With braids all the rage, we took a look back at the archives and spotted this ‘do from Hilary Duff. Back in 2010 she rocked this look at the book signing of her novel Elixir. The beauty of it is that it is not initially clear how many braids there are, where they start, or where they finish. It is quite a difficult look to recreate but we have broken it down into a step by step guide for you to follow. The style obviously works best on those with long hair, either wavy or straight.

[/vc_column_text][vc_empty_space height=”32px”][/vc_column][/vc_row][vc_row][vc_column width=”1/2″][vc_column_text]Step 1: Divide hair up into four separate sections; one at the top, bottom, left and right. Clip up all of the sections except for the one on the right.

Step 2: With this section do a slightly loose French braid until you reach just behind the ear and then change to a regular braid. When you come to the end secure it with a clear band.

Step 3: Now do exactly the same with the section on the left side.

Step 4: Take the section at the top of the head and again French braid until you get to the crown where you switch to the regular braid.

Step 5: Divide up the bottom section into five separate sections and braid each one into a regular braid, securing with clear bands.

Step 6: With each of the five bottom braids you now need to wrap them from left to right, pinning them as you go.

Step 7: Take hold of the side braids and weave them together to create a swirly shape, making sure that you tuck any ends under. Again as you go make sure to pin them in place.

Step 8: With the area that is left at the top of the head, fill this space by swirling the final braid. This should also give the style some height. Pin as you go and then spray over with some strong hold hairspray to keep everything in place.[/vc_column_text][vc_empty_space height=”32px”][/vc_column][vc_column width=”1/2″][vc_column_text]

[/vc_column_text][/vc_column][/vc_row]

Christmas party style

[vc_row][vc_column width=”1/1″][/vc_column][/vc_row][vc_row][vc_column width=”1/1″][vc_column_text]Glittery gold gilded eyes were all over the ss15 catwalks and we have seen them popping up all over the place recently. The look is great for adding a touch of sparkle on a night out and is perfect for rocking at a festival. All skin tones can get away with wearing gold toned shades as they will warm up your complexion. Just remember that if you have dark, olive skin you should choose a dark pigmented shadow that is almost bronze. For those of you with fair skin a light yellow gold looks amazing.


Learn how to create amazing, high fashion makeup looks on our BRAND NEW fashion makeup courses.[/vc_column_text][vc_empty_space height=”32px”][/vc_column][/vc_row][vc_row][vc_column width=”1/2″][dt_vc_list style=”1″ bullet_position=”top” dividers=”true”]

  • Shimmery brown shadow
  • Metallic shadow
  • Gold glitter pieces (preferably fine)
  • Loose gold glitter
  • Black mascara

[/dt_vc_list][vc_empty_space height=”32px”][/vc_column][vc_column width=”1/2″][vc_column_text]

[/vc_column_text][/vc_column][/vc_row][vc_row][vc_column width=”1/1″][vc_custom_heading text=”Get The Look” font_container=”tag:h3|text_align:left” google_fonts=”font_family:Abril%20Fatface%3Aregular|font_style:400%20regular%3A400%3Anormal”][vc_empty_space height=”32px”][/vc_column][/vc_row][vc_row][vc_column width=”1/1″][vc_column_text]Step one:

Begin by prepping your eyelids with primer to give you a nice smooth surface and make sure that your makeup lasts.

Step two:

Wash over your lids with the shimmery brown shadow really focusing on the crease. Then blend the shadow up towards your brow bone.

Step three:

Take the metallic shadow and press it into the centre of your eyelids.

Step four:

With your fingertips apply the fine gold glitter pieces where you have just pressed on the metallic shadow as well as along the bottom lash line.

Step five:

With the loose gold glitter use a thin eyeliner brush to line your eyes with it. The brush will guarantee that your precision is spot on.

Step six:

To finish the look coat your lashes with two coats of black mascara. For even distribution zigzag the wand from left to right as you brush from the root to the tip of your lashes.


If you want to try this trend but would prefer a slightly more subtle look then you can choose a lighter more Champagne shade of eye shadow which will give you the same glow but will be more in keeping with the rest of your makeup look.[/vc_column_text][/vc_column][/vc_row]

291457985 8a212e7f2c o

[vc_row][vc_column][vc_column_text]We spotted January Jones at the FOX Programming Presentation and she was rocking our favourite summer look so far. Look no further if you would like to add a pop of colour to your makeup as January’s lip colour is perfect. Follow our step by step guide on how to recreate this fun summer style.

[/vc_column_text][/vc_column][/vc_row][vc_row][vc_column width=”1/1″][vc_custom_heading text=”How To Get The Look” font_container=”tag:h3|text_align:left” google_fonts=”font_family:Abril%20Fatface%3Aregular|font_style:400%20regular%3A400%3Anormal”][/vc_column][/vc_row][vc_row][vc_column width=”1/1″][dt_vc_list style=”1″ bullet_position=”top” dividers=”true”]

  • Step one: Begin by prepping your skin by moisturising your face and neck and then apply a primer.
  • Step two: Apply your foundation, which should closely match your skin tone, followed by concealer for any dark circles and blemishes.
  • Step three: Now you can move on to your eyes. Fill in your eyebrows using a similar shade of eye brow pencil or eye shadow. Well defined brows will help to give you a more polished finish. Select a nude coloured eye shadow and apply this as a base all over your eyelids up to the brow bone. Dramatic eyeliner is next so take a black gel liner and line your upper lashes creating a flick at the end. You can then work on thickening the line gradually to get the desired effect. This is much easier than trying to thin a too thick line. Curl your lashes and then take jet black volume mascara and brush on two coats.
  • Step four: For your cheeks go for a pale pink blusher and highlight the apples of your cheeks for a healthy glow before sweeping it up to your hair line.
  • Step five: Finish off the summer make up look with a bright pink long lasting lipstick or a lip gloss. If you prefer you can use a matte lipstick just make sure that you exfoliate and moisturise your lips first to get a good base.

[/dt_vc_list][/vc_column][/vc_row]

We love Julianne Hough who always provides us with short hair inspiration. She is never afraid to try something new, this time sporting a textured faux hawk to the Golden Globes. The style actually looked amazing with the art deco inspired Monique Lhuiller dress and gave it an edgy yet sophisticated twist.


Step one:

Shampoo and condition hair, adding an extra dose of conditioner to remove any tangles and ensure that it is lovely and glossy. Remember to rinse it out well.

Step two:

Spritz over with volumising spray about an inch from the roots to give it some extra lift. Blow dry hair well using a round brush until it is completely dry.

Step three:

Start from the back of the head and backcomb small one to two inch horizontal sections until you have worked your way right to the front. Take hold of the backcombed Mohawk section and clip it up so it is out of the way.

Step four:

Gently tease the sides to give them extra texture and volume and then part the hair on each side of the temple. Take one of the sides and divide it into a top and bottom section. Twist these back to the nape of the neck, creating little ponytail which then need to be pinned in place. Do exactly the same on the other side.

Step five:

With the top section take three inches of hair from the front, twist the hair to the left hand side and pin it in place. Then take the following three inches, twist to the right and again pin in place. Keep doing this until you reach the back of the head and you have made a twisted style Mohawk.

Step six:

To finish off you can use a touch of volumising spray or dry shampoo to add extra texture and volume where needed, followed by some strong hold hairspray to ensure the style stays in place.

By Gemma

Creating the perfect cat eye is always a bit of a struggle and a lot of practice is needed to make sure that both eyes are even. Luckily this year is all about the minimalist approach and the cat eye has a more subtle, paired down style. The anti cat eye is also a great way to introduce yourself to the typical cat eye style as it is a reverse of the look. The main differences are that you begin in the middle of the eye on the top eyelid and lower water line but you do not extend the line out past your eye like you do with the traditional cat eye. This look has gradually been developing over the last few seasons with variations ranging from soft, full lines to striking, defined lines. Read on to find out how to rock this trend in four easy to follow steps.


Try the trend

Step one:

Begin by moisturising and then apply your foundation and concealer as normal. You want to create a flawless looking, dewy base. Make sure that you have blended everything well, particularly your foundation around your jaw line. If you want to you can also apply a nude coloured eye shadow. Lightly pencil in your eyebrows if required but remember this look is supposed to be quite minimal.

Step two:

Take your black eye pencil or liquid eyeliner if you prefer, and draw a line from the centre of your upper eyelid towards the outer corner of your eye. Do the same on your lower lash line. You should have just created a V shape.

Step three:

Now you can fill in your waterline with eyeliner. If you are going for a more smokey effect then you can gently smudge the lines with a cotton bud.

Step four:

Finish off by curling your eyelashes with a curler and then sweep on two coats of volumising mascara.

By Gemma

We love the glamour of an updo and are always looking for something a little bit different, so Bella Thorne’s fishtail braid chignon has left us more than inspired. From the front it appears to be a classic chignon, but from behind you can admire the intricate braiding. This look is easier to create than you would think and it is perfect for evening wear or even as a bridal updo.


Step one:

To get the best results you need to make sure that you hair is completely free from any knots so give it a thorough brush through first. You can either start with freshly washed and dried hair or use a touch of dry shampoo on your roots to freshen up.

Step two:

Begin by splitting your hair down the centre parting. You want to start with the right hand section of hair so tie up the left hand side to keep it out of the way.

Step three:

With the right hand side of hair divide this in two. To create the fishtail braid hold a section in each hand and then pull a small amount loose from the right side and pass it to the left. Now do this from the left side to the right and keep doing this until you reach the bottom. Secure in place with a clear hair elastic.

Step four:

Now you can release the hair that you tied up on the left hand side of your head and repeat the previous step on it.

Step five:

With both braids now completed you can entwine them around each other, twisting upwards into a chignon. Secure in place with bobby pins. Once both braids are complete, twist them around each other and upward into a chignon at the back of your head.

Step six:

Pull out a few pieces of hair around your face to create a romantic frame and then mist over with hairspray to create hold.

By Gemma

4 day hair course

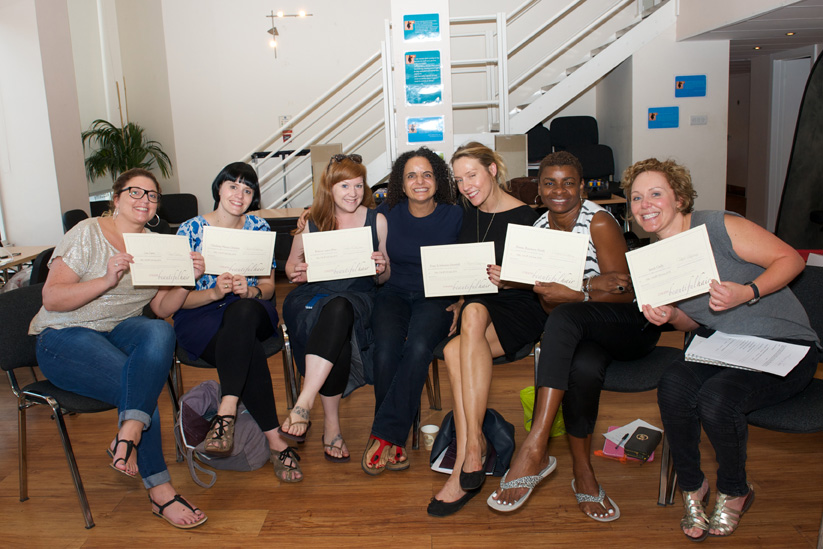
For those of you signing up for our bridal & red carpet hair courses, it can be tough to choose between our 2 and 4 day courses! Our 4 day courses, complete with a professional photoshoot on the final day, are becoming increasingly popular with our students and as such, we thought that you might like to know a bit more about why that is…

4 day hair course
“I can honestly say I really really enjoyed every moment of the 4 day course and I feel I have learnt so much. I would highly recommend to anyone! If anyone is in 2 minds about doing this course I can honestly tell you it was amazing and I would 100% do it again!!” Emma – 5* Hotcourses review

As with all of our courses, the 4 day course is suitable for ALL experience levels: from absolute beginner to a trained professional – there is something for everyone.

The way that we are able to work in this way is that our 4 day course only ever has a maximum of 6 students at a time, meaning that everyone can get as much or as little help as they need from Pam and her trusty assistants. Unlike our 2 day courses, on which Pam trains using a mix of live model demonstrations and hands on practice for the students using the highest quality training heads (and a live model for braiding practice!), students attending our 4 day course will get the chance to work on live models of their own.

Over the 4 days, you will work with models who have short, medium and long hair so that you get a chance to play with a variety of styles. Whilst of course, there are set styles that Pam will demonstrate on our 2 and 4 day courses (with step by step instructions), you will have the freedom to play around with these and make them your own.

It is important that you know the idea behind Pam’s teaching method is not that you come away having learned how to create a set number of styles, but that you learn the prepping, securing and finishing techniques to equip you with the knowledge to be able to create any style.

Our courses are designed to train people to feel happy and confident to produce all styles once they leave. As with all of our courses, if there are any particular styles that you would like to cover, you are more than welcome to bring in some images and Pam will teach you how to do that as well.

How does the course pan out?

Day One
Using Heated Rollers
Working with Short Hair
Soft and relaxed Grecian Styles
Low buns (no donut)
Finger Waves
Day Two
Short and Sleek styles – Audrey Hepburn
Over shoulder style ideas
Red Carpet Styles
Plaits, twists and quick plaited buns
Day Three
Working with Long Hair
Creating different curls & waves
High buns for long hair
½ up ½ down styles
2-in-1 styles
Time trial
Day four
Low buns for long, heavy Hair
Photo Shoot
Business Advice Session
Watch our courses live in action, on our latest trailer here! To Book onto our next 4 day course in June, go here.
“Pam is the most lovely lady and wonderful teacher. After doing this course I feel like I have the foundations to do anything. Would highly recommend!” Kimberley – 5* Hotcourses review

If you’re interested in booking onto our 4 day course or would like any further information on what Create Beautiful Hair has to offer, don’t hesitate – get in touch, today.

Having been around forever you would think that braids must be on their way out, but then we see Amanda Seyfried at the premiere of ‘While We’re Young’ and we remember why we love them so much. This youthful look can be hard to pull off but it works brilliantly paired with Amanda’s Valentino dress and smokey eye makeup, resulting in a sophisticated and structured look.


Here’s how to get the look

Step one:

Wash, condition and blow dry your hair to start. If you don’t have time to wash your hair then a great tip is to mist over a product like a foundation mist which will revitalise you look. Follow this up by blow drying and brushing hair to refresh it for that just washed look.

Step two:

Make a clean centre parting from the top of your head right down to the nape of your neck so that your hair is split into two sections. Apply some molding wax to the sections to give your hair added texture and hold.

Step three:

You can now start to French braid one side of your hair. Begin with a section about a quarter to half an inch size. Make sure that you pull the hair tightly as you braid down the head, increasing the size of the section as you go. When you reach the bottom secure the end with a clear hair band.

Step four:

Take the end of the braid and roll it up into the desired shape and when you are happy with it fix it in place using bobby pins. You can now repeat the steps on the other side of the head.

Step five:

To make sure that the style stays in place spray over it with some strong hold hairspray.

By Gemma