wedding hairstylist

Being a wedding hairstylist and working with brides is without a doubt one of the best jobs in the world. If you’re looking at our courses as a way to really kick start your career in the world of weddings, you’re making an excellent decision!   A wedding hairstylist is so much more than just … Read more

heated rollers

Heated rollers – if there’s one thing a bridal hairstylist needs in her arsenal, it’s these babies!   If you’ve ever attended one of our bridal hair courses, you’ll know that the first thing we cover is correct roller positioning for beautiful, bouncy curls. Even our students who have been styling hair for years find this incredibly … Read more

Game of Thrones hair inspiration

Unless you’ve been living under a rock for years, you’re probably well aware that Game of Thrones hair inspiration is a pretty big deal – the fantastical, medieval toned dos have been consistently incredible for years.   If you haven’t noticed this, now is the time to! Lots of brides to be find wedding hair … Read more

4 day bridal hair course

[vc_row][vc_column][vc_column_text css=”.vc_custom_1466193808353{margin-top: 32px !important;margin-bottom: 32px !important;}”]Our 4 day bridal hair course is one of our best selling courses and once you know a bit about it, it’s easy to see why! Whether you’re a professional hairdresser wanting to up your bridal hairstyling game and stay on top of all the latest techniques and trends, or … Read more

49w e1495991396697

[vc_row][vc_column width=”1/1″][vc_column_text] 4 Day Bridal Hair Course: Student Portfolio Photoshoot [/vc_column_text][vc_column_text css=”.vc_custom_1459783915848{margin-top: 32px !important;margin-bottom: 32px !important;}”]Last week we enjoyed another hugely successful 4 day bridal hair course in London, with students of all experience levels and backgrounds finishing with some really gorgeous hairstyles! Our 4 day bridal hair course is intensive and fun filled, with … Read more

IMG 3909

[vc_row][vc_column][vc_column_text css=”.vc_custom_1489245279346{margin-top: 62px !important;margin-bottom: 32px !important;}”] Bridal & Party Hairstyles created by our students! [/vc_column_text][/vc_column][/vc_row][vc_row][vc_column width=”1/2″][vc_column_text css=”.vc_custom_1489246692389{margin-top: 62px !important;margin-bottom: 32px !important;}”] Whether you’re a total beginner at creating gorgeous bridal hairstyles or a pro hairdresser with year’s of experience. . . our online bridal hair course, 2 day and 4 day bridal hair up courses … Read more

11969296755 5b9a8d9e43 o d

[vc_row][vc_column width=”1/1″][/vc_column][/vc_row][vc_row][vc_column width=”1/1″][vc_column_text]

One of our favourite Oscars hairstyles has to be from Julia Roberts who wore vintage Valentino to the 73rd Academy Awards back in 2001. She selected a gown from Valentino’s 1992 collection, looking the epitome of old Hollywood glamour when she collected the award for Best Actress in Erin Brockovich. Julia Roberts wore this vintage Valentino gown to the 73rd Academy Awards in 2001 where she won best Actress for Erin Brockovich. The black velvet gown with white piping was paired with subtle jewellery and make up and the most beautiful updo. Take a look at how to create our take on it.

[/vc_column_text][vc_empty_space height=”32px”][/vc_column][/vc_row][vc_row][vc_column width=”1/2″][vc_column_text]Step one: Start with freshly washed and thoroughly dried hair. Apply a hair mousse that will lift the roots and evenly cover the hair from the roots to the tips. With the hair dryer and a large flat brush create extra body and shine.

Step two: Next create a side parting on the left side of the head. Then create a section from the parting to the top of the ear on both sides, and a final section from ear to ear at the back. Clip the bottom section out of the way.

Step three: With the back section you need to backcomb it to build in more volume. Smooth over the top of the section and create a loose ponytail. You can mist over the section with hairspray to tame any flyaways. Unclip the bottom section and then pin the ponytail into the base.

Step four: Now take all of the loose hair and roll it up into the base of the ponytail allowing it to spread out. Take hold of a large bobbypin and pin it right into the base.

Step five: Take the front section on the right hand side that you left out at the start, pulling it over to the left and wrap it around and under the roll. Pin in place and then do the same with the section on the left, pulling it over to the right wrapping it around and under the roll. Again pin it in place.[/vc_column_text][/vc_column][vc_column width=”1/2″][vc_column_text]

[/vc_column_text][vc_column_text]

[/vc_column_text][/vc_column][/vc_row]
braids

[vc_row][vc_column width=”1/1″][/vc_column][/vc_row][vc_row][vc_column width=”1/1″][vc_column_text]

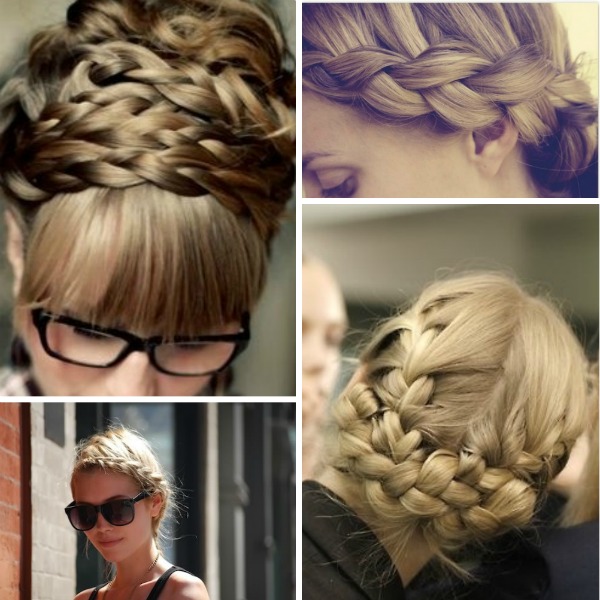
With braids all the rage, we took a look back at the archives and spotted this ‘do from Hilary Duff. Back in 2010 she rocked this look at the book signing of her novel Elixir. The beauty of it is that it is not initially clear how many braids there are, where they start, or where they finish. It is quite a difficult look to recreate but we have broken it down into a step by step guide for you to follow. The style obviously works best on those with long hair, either wavy or straight.

[/vc_column_text][vc_empty_space height=”32px”][/vc_column][/vc_row][vc_row][vc_column width=”1/2″][vc_column_text]Step 1: Divide hair up into four separate sections; one at the top, bottom, left and right. Clip up all of the sections except for the one on the right.

Step 2: With this section do a slightly loose French braid until you reach just behind the ear and then change to a regular braid. When you come to the end secure it with a clear band.

Step 3: Now do exactly the same with the section on the left side.

Step 4: Take the section at the top of the head and again French braid until you get to the crown where you switch to the regular braid.

Step 5: Divide up the bottom section into five separate sections and braid each one into a regular braid, securing with clear bands.

Step 6: With each of the five bottom braids you now need to wrap them from left to right, pinning them as you go.

Step 7: Take hold of the side braids and weave them together to create a swirly shape, making sure that you tuck any ends under. Again as you go make sure to pin them in place.

Step 8: With the area that is left at the top of the head, fill this space by swirling the final braid. This should also give the style some height. Pin as you go and then spray over with some strong hold hairspray to keep everything in place.[/vc_column_text][vc_empty_space height=”32px”][/vc_column][vc_column width=”1/2″][vc_column_text]

[/vc_column_text][/vc_column][/vc_row]