

Oscars

Oscars Red Carpet Bridal Hair & Makeup Inspiration for 2017 The Oscars has got to be one of the best places for bridal hair and makeup artists to stay on top of all the latest red carpet hair and makeup looks that are set to be hot to trot for special events and wedding alike … Read more

grammys

Awards season is a pretty great time for all of us hair and makeup artists – the inspiration just keeps on coming! If you’re keen to stay on top on all the latest hair and makeup trends set to light up red carpets and church aisles alike for 2017, celeb events is where it’s at. … Read more

braiding course

[vc_row][vc_column][vc_column_text css=”.vc_custom_1466852397755{margin-top: 32px !important;margin-bottom: 32px !important;}”]With our 1 day braiding course now being available nationwide (in London, Manchester, Bristol and Birmingham), we just can’t stop obsessing over all the gorgeous braided hairstyles we keep seeing all over the red carpet events! With so many plaits and braids to learn, and so many ways to use … Read more

hair 741769 640

[vc_row][vc_column width=”1/1″][vc_column_text]

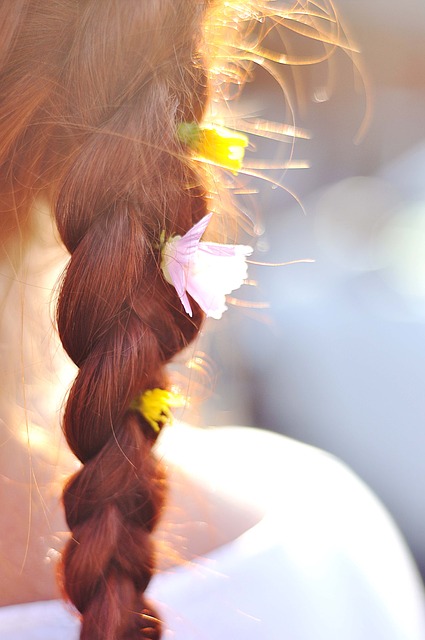
For the premiere of Man Men series 7 January Jones rocked a twisted French braid and a unique makeup look – blue eyeliner on the top lashes and gold on the bottom. This pretty summer style is actually three braids in one using a trio of techniques to create an undone, twisted look.

[/vc_column_text][vc_empty_space height=”32px”][/vc_column][/vc_row][vc_row][vc_column width=”1/2″][vc_column_text]

How to

Step one: Begin with freshly washed hair and while it is still damp apply some mousse which will help to make styling easier.

Step two: While you are blow dying, back comb the hair and mist over with some finishing spray to tame flyaways.

Step three: Now that the hair is dry apply a small amount of oil through the mid lengths to the ends as this will make the hair much easier to braid.

Step four: Now you can begin braiding. Split the hair into three sections, left, right, and bottom, allowing the parting to fall naturally. Start with the section on the right and form a French braid. It should begin right at the very top of the head and finish at the lower neck. Secure with a clear hair elastic.

Step five: Next, take hold of the section on the left hand side. This should be used to make a rope braid right along this side. When you have finished you can connect this braid with the one on the right, using a clear hair elastic.

Step six: You should have one section of unbraided hair left. Use this to create a regular braid, braiding tightly from the top to the bottom. Fix with and elastic when you get to the end.

Step seven: Take hold of the three separate braids and plait together to make one finished braid. Secure it with another clear elastic. If there are strands which naturally frame the face then gently bend these with hair straighteners. Once you are happy you can spray all over the hair with finishing spray.[/vc_column_text][/vc_column][vc_column width=”1/2″][vc_column_text]

[/vc_column_text][/vc_column][/vc_row]
12 asian bride smoky eyes london wedding 2

[vc_row][vc_column width=”1/1″][vc_column_text]

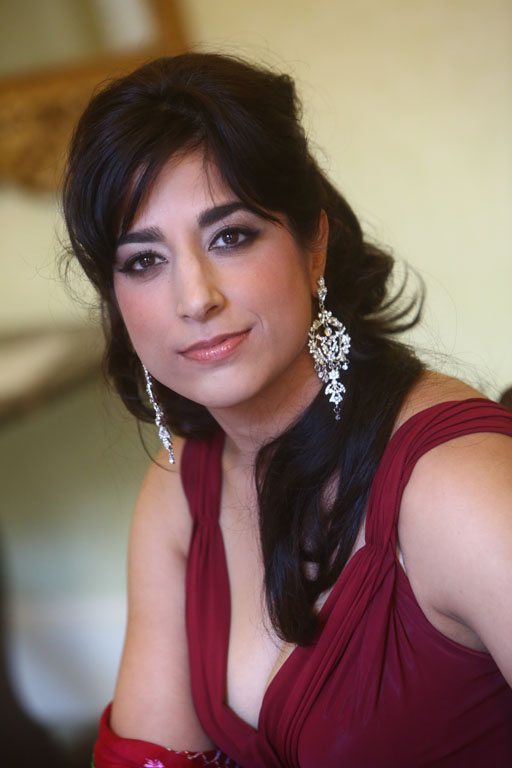
Smokey eyes are a go to look for many of us but what do we do for clients that want that sexy look, but a little lighter for warmer weather or daytime wear? Smokey eyes is a very popular look with clients, both bridal and special occasion, so it’s an important one to learn! We go through this look thoroughly on our 2 & 4 day makeup courses, so if you’re struggling, why not join us on one of our courses for Pam’s expert guidance? Here are some top tips and tricks to help you achieve a softer smokey eye:

[/vc_column_text][vc_empty_space height=”32px”][/vc_column][/vc_row][vc_row][vc_column width=”1/2″][vc_custom_heading text=”Create A Lighter Look” font_container=”tag:h3|text_align:left” google_fonts=”font_family:Abril%20Fatface%3Aregular|font_style:400%20regular%3A400%3Anormal”][vc_column_text]

Shimmer bronzer is your friend when it comes to the summer smokey eye and it is a great product to warm up your eyes. It is also perfect for giving a look that can be worn both day and night.

[/vc_column_text][vc_empty_space height=”32px”][vc_custom_heading text=”Give It Staying Power” font_container=”tag:h3|text_align:left” google_fonts=”font_family:Abril%20Fatface%3Aregular|font_style:400%20regular%3A400%3Anormal”][vc_column_text]

For a look that won’t melt down your face in the heat, first apply a shadow primer followed by your shimmering and smokey eye shadows. A dot of Vaseline in the centre of the lid will help to highlight it. Long wearing and waterproof products are also a must during the summer months.

[/vc_column_text][vc_empty_space height=”32px”][vc_custom_heading text=”Get The Look” font_container=”tag:h3|text_align:left” google_fonts=”font_family:Abril%20Fatface%3Aregular|font_style:400%20regular%3A400%3Anormal”][vc_column_text]

Begin by using a matte skin coloured shadow applying it from the lash line to the brow. With a medium to dark smokey shadow define the crease in a windscreen wiper motion. Blend this downwards towards your lashes making sure that you avoid the inner third of your eyelid. Take a darker shade and create a ‘V’ shape from your outer eye line right to the outer crease and blend towards the centre of your eyelid. Finish the look with gel eye liner along your lash line and then smudge.

[/vc_column_text][vc_empty_space height=”32px”][vc_custom_heading text=”Fix Any Mistakes” font_container=”tag:h3|text_align:left” google_fonts=”font_family:Abril%20Fatface%3Aregular|font_style:400%20regular%3A400%3Anormal”][vc_column_text]

Don’t worry if you make a mistake, you can repair this with some makeup remover on a cotton bud to clean up and then reapply your makeup after. Just stay calm, and continue!

[/vc_column_text][vc_empty_space height=”32px”][vc_custom_heading text=”Don’t Shy Away From Shine” font_container=”tag:h3|text_align:left” google_fonts=”font_family:Abril%20Fatface%3Aregular|font_style:400%20regular%3A400%3Anormal”][vc_column_text]

Metallic shades look great this season whatever colour you go for. Just remember that if the eye makeup is bold then choose a sheer lip colour.

[/vc_column_text][/vc_column][vc_column width=”1/2″][vc_column_text]

[/vc_column_text][/vc_column][/vc_row]
Katherine Heigl at 27 Dresses Premiere 10

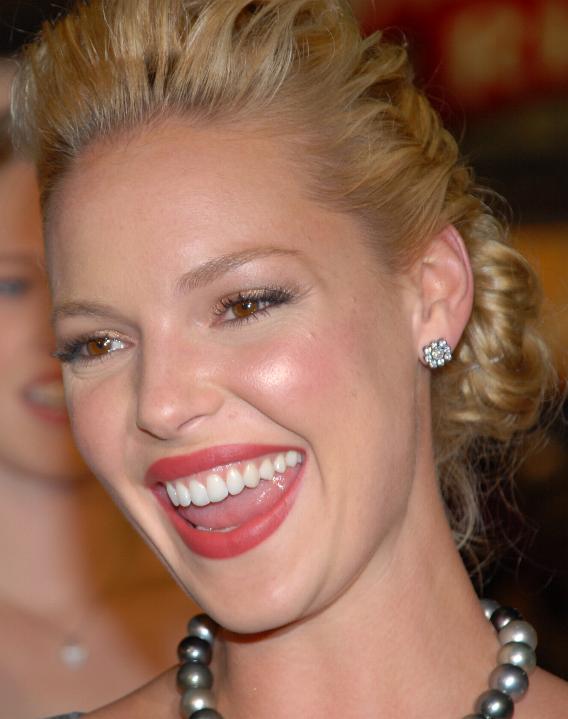
[vc_row][vc_column width=”1/1″][/vc_column][/vc_row][vc_row][vc_column width=”1/2″][vc_column_text]Looking for that perfect hairstyle for a big night? We love Katherine Heigl’s chic up do that she wore to the ‘One for the Money’ premiere. This style is perfect for a prom or smart occasion like a wedding and is the ideal mix of stylish yet undone.

[/vc_column_text][/vc_column][vc_column width=”1/2″][vc_column_text]

[/vc_column_text][/vc_column][/vc_row][vc_row][vc_column width=”1/1″][vc_empty_space height=”32px”][vc_custom_heading text=”How To:” font_container=”tag:h3|text_align:left” google_fonts=”font_family:Abril%20Fatface%3Aregular|font_style:400%20regular%3A400%3Anormal”][vc_empty_space height=”32px”][/vc_column][/vc_row][vc_row][vc_column width=”1/1″][vc_column_text]Step one: Ideally the hair should be washed the night before as this will actually make it easier to style. Failing that wash and condition as normal and then apply a touch of oil.

Step two: Rough dry the hair which will help to maintain the volume giving it an almost fluffy look. You do not want to be creating a smooth and sleek finish. Make sure that while you are blow drying the hair that you pull it all backwards just using your fingers as you do not want there to be a parting.

Step three: Now that the hair is completely dry take a clampless curling iron and select random sections of hair, wrapping them around the iron. Gradually make your way round from one side of the face to the other. The idea with the waves is to create some soft texture so just keep randomly adding them in throughout the hair.

Step four: Next use bobby pins and begin pinning the hair back into a collection of messy buns. With Katherine’s hair the stylist created an almost French twist/ bun look in an oblong shape. You can pull the hair back in whatever direction that it sits best, following the shape of the head. Pin as you go to hold everything in place, it doesn’t matter if the bobby pins are visible as this adds to the style. Mist over with hairspray so the look lasts all night.[/vc_column_text][/vc_column][/vc_row]

Jury Cannes 2015 3

[vc_row][vc_column width=”1/1″][/vc_column][/vc_row][vc_row][vc_column width=”1/1″][vc_column_text]

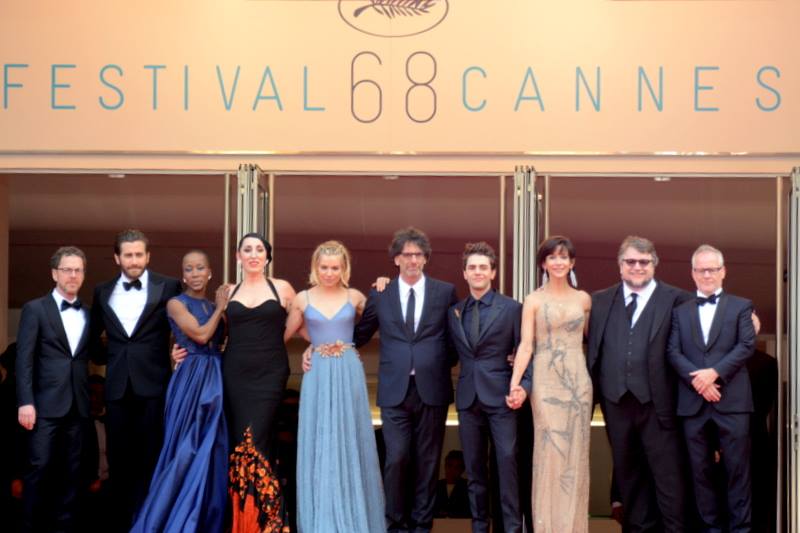
Cannes Film Festival this year had so many A listers hitting the red carpet dressed up to the nines. Cannes always sets the fashion stakes high and we were not disappointed! Here is a roundup of our favourite looks from the first week, and there is still more to come in this glamorous 12 day event.

[/vc_column_text][vc_empty_space height=”32px”][/vc_column][/vc_row][vc_row][vc_column width=”1/1″][vc_custom_heading text=”Lupita Nyong’o ” font_container=”tag:h4|text_align:left” google_fonts=”font_family:Abril%20Fatface%3Aregular|font_style:400%20regular%3A400%3Anormal”][/vc_column][/vc_row][vc_row][vc_column width=”1/2″][vc_column_text]

Oscar winner Lupita Nyong’o looked a picture as she stood swirling on the red carpet in her mint green Gucci dress. Lupita is always one to embrace a bright shade and her plunging gown with flower detail was no different. Her simple hairdo consisted of a big bun which ensured all eyes were on her dress.

[/vc_column_text][/vc_column][vc_column width=”1/2″][vc_column_text]

[/vc_column_text][/vc_column][/vc_row][vc_row][vc_column width=”1/1″][vc_custom_heading text=”Cate Blanchett ” font_container=”tag:h4|text_align:right” google_fonts=”font_family:Abril%20Fatface%3Aregular|font_style:400%20regular%3A400%3Anormal”][/vc_column][/vc_row][vc_row][vc_column width=”1/2″][vc_column_text]

[/vc_column_text][/vc_column][vc_column width=”1/2″][vc_column_text]

We absolutely love Cate’s Giles gown, and may even go as far to say this is our favourite creation of week one. She chose to wear this complex strapless dress with its hypnotic print to the premiere of her latest film, Carol.

[/vc_column_text][/vc_column][/vc_row][vc_row][vc_column width=”1/1″][vc_custom_heading text=”Sienna Miller” font_container=”tag:h4|text_align:left” google_fonts=”font_family:Abril%20Fatface%3Aregular|font_style:400%20regular%3A400%3Anormal”][/vc_column][/vc_row][vc_row][vc_column width=”1/2″][vc_column_text]

This year Sienna Miller is a Cannes jury member, flying the flag for the Brits. She looked stunning in a simple, understated one shouldered Lanvin dress which was given a contemporary edge with the addition of an exposed zip. We love how the design sweeps behind her arm and forms a fancy knot.

[/vc_column_text][/vc_column][vc_column width=”1/2″][vc_column_text]

[/vc_column_text][/vc_column][/vc_row][vc_row][vc_column width=”1/1″][vc_custom_heading text=”Rachel Weisz” font_container=”tag:h4|text_align:right” google_fonts=”font_family:Abril%20Fatface%3Aregular|font_style:400%20regular%3A400%3Anormal”][/vc_column][/vc_row][vc_row][vc_column width=”1/2″][vc_column_text]

[/vc_column_text][/vc_column][vc_column width=”1/2″][vc_column_text]

Another Brit favourite is Rachel Weisz who looked a lot younger than her 45 years in a flattering black Narciso Rodriguez jumpsuit. Rachel is one step ahead of a trend as jumpsuits are set to be big news this season. She also followed the trend of simple hair and barely there makeup which most of the stars seemed to adopted, after all less is more.

[/vc_column_text][/vc_column][/vc_row][vc_row][vc_column width=”1/1″][vc_custom_heading text=”Naomi Watts” font_container=”tag:h4|text_align:left” google_fonts=”font_family:Abril%20Fatface%3Aregular|font_style:400%20regular%3A400%3Anormal”][/vc_column][/vc_row][vc_row][vc_column width=”1/2″][vc_column_text]

Naomi Watts looked picture perfect as she walked the red carpet in a grey, featured number designed by celeb favourite Elie Saab. You can’t fail to notice her sparkling accessories and in particular that beautiful diamond necklace.

[/vc_column_text][/vc_column][vc_column width=”1/2″][vc_column_text]

[/vc_column_text][/vc_column][/vc_row]
11969296755 5b9a8d9e43 o d

[vc_row][vc_column width=”1/1″][/vc_column][/vc_row][vc_row][vc_column width=”1/1″][vc_column_text]

One of our favourite Oscars hairstyles has to be from Julia Roberts who wore vintage Valentino to the 73rd Academy Awards back in 2001. She selected a gown from Valentino’s 1992 collection, looking the epitome of old Hollywood glamour when she collected the award for Best Actress in Erin Brockovich. Julia Roberts wore this vintage Valentino gown to the 73rd Academy Awards in 2001 where she won best Actress for Erin Brockovich. The black velvet gown with white piping was paired with subtle jewellery and make up and the most beautiful updo. Take a look at how to create our take on it.

[/vc_column_text][vc_empty_space height=”32px”][/vc_column][/vc_row][vc_row][vc_column width=”1/2″][vc_column_text]Step one: Start with freshly washed and thoroughly dried hair. Apply a hair mousse that will lift the roots and evenly cover the hair from the roots to the tips. With the hair dryer and a large flat brush create extra body and shine.

Step two: Next create a side parting on the left side of the head. Then create a section from the parting to the top of the ear on both sides, and a final section from ear to ear at the back. Clip the bottom section out of the way.

Step three: With the back section you need to backcomb it to build in more volume. Smooth over the top of the section and create a loose ponytail. You can mist over the section with hairspray to tame any flyaways. Unclip the bottom section and then pin the ponytail into the base.

Step four: Now take all of the loose hair and roll it up into the base of the ponytail allowing it to spread out. Take hold of a large bobbypin and pin it right into the base.

Step five: Take the front section on the right hand side that you left out at the start, pulling it over to the left and wrap it around and under the roll. Pin in place and then do the same with the section on the left, pulling it over to the right wrapping it around and under the roll. Again pin it in place.[/vc_column_text][/vc_column][vc_column width=”1/2″][vc_column_text]

[/vc_column_text][vc_column_text]

[/vc_column_text][/vc_column][/vc_row]

Nicole Kidman 2012 cropped

[vc_row][vc_column width=”1/1″][/vc_column][/vc_row][vc_row][vc_column width=”1/2″][vc_column_text]

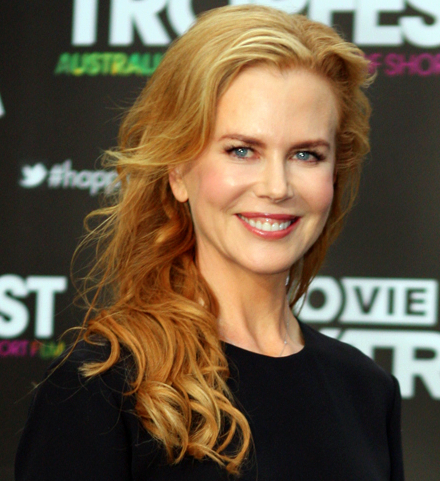
Today, we’re taking a look back for one of our favourite up dos which came from Nicole Kidman back in 2013. We have put together a quick ‘how to’ of our own version of this pretty curved lace braid for you to try your hand at…

[/vc_column_text][vc_empty_space height=”32px”][vc_column_text]Step 1: You need to start off by adding in lots of texture as it will not work well on sleek, glossy hair. If the hair has been freshly washed then comb through mousse and tousle it as you blow dry.

Step 2: Set the hair in hot rollers and leave them in for five minutes, or alternatively curl with tongs and once cool comb through with your fingers to separate up the ringlets.

Step 3: Take hold of a section of hair just above the left ear and create a lace braid from the left to the right adding in pieces of hair as you go. Once you have braided across the middle of the head you can begin to curve the braid down until you reach the right ear. Finish the braid off as a regular plait and secure with a clear hair band.

Step 4: Start at the left side again and create a second lace braid just under the first. Braid in exactly the same way again curving once you reach the middle of the head; make sure that you add in hair from the hairline as you curve round pulling in all of the hair. Finish with a regular plait and secure with another hair band.

Step 5: Roll up the second braid to make a spiral and fix in place with bobby pins.

Step 6: Take hold of the first braid and curl it round the second braid and again pin in place.[/vc_column_text][/vc_column][vc_column width=”1/2″][vc_column_text]

[/vc_column_text][vc_column_text]

[/vc_column_text][/vc_column][/vc_row]
We showed you our favourite Coachella beauty looks and of course Kate Bosworth got a mention. We will definitely be rocking her look for the festival season so we have put together a step by step guide so you too can recreate it. Inspiration for the ‘do came from the 90s, where a half up half down look was all the rage, with a grunge chic/ bed head look and detailing provided by the braid.


Step one:

This style works best on two day old, dry hair. Your hair also needs to be parted in the centre. Take a small section of hair, no wider than a finger tip width, along the centre parting. It should start at the hair line and end at the crown of your head.

Step two:

Now that you have this separate section you can create a cornrow at the crown of your head, braiding until you reach your hairline. Fix the braid in place using a small bobby pin, pushing it up the centre of the braid keeping it as flat to the braid as possible. Split the end of the braid into two sections by dividing the third section of the braid in two and use these to frame the face.

Step three:

Give the lengths of your hair a touch of added texture with some texturising spray, or wax if you prefer. Gather up your hair beginning at the top of your ears so that you are holding the top half of your hair. Rather than putting this into a ponytail, Kate has hers in a knot. Fix this in place using a clear hair band. Any pieces of hair that are framing your face can be tucked back behind your ears.

Step four:

Finish off the look by misting over with some flexible hold hairspray.